


Buoyage
IALA Buoyage Regions
The world is divided into two buoyage regions by the International Association of Marine Aids to Navigation and Lighthouse Authorities (IALA).
-
Region A – Covers Europe, Africa, Australia, New Zealand, most of Asia, and the Arabian Gulf. Red marks port and green marks starboard when entering from seaward. (Think: Red to Port when Returning).
-
Region B – Covers the Americas, Japan, South Korea, and the Philippines. Here it’s reversed: red marks starboard and green marks port when entering from seaward. (Think: Red Right Returning).
All other marks (cardinal, isolated danger, safe water, special, wreck buoys) are the same worldwide.

Lateral Marks (IALA A)
Lateral marks are used to show the edges of a navigable channels, guiding vessels safely into harbours, rivers, and passages. In IALA Region A, red buoys mark the port (left) side of the channel and green buoys mark the starboard (right) side when entering.
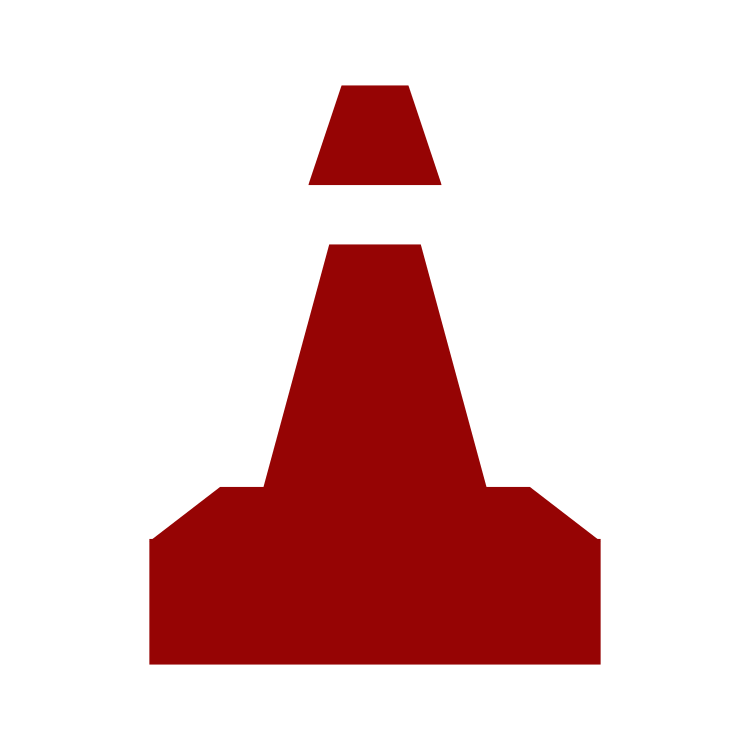

Port Lateral Mark
- Purpose: Marks the Port Side of a Channel or Fairway
- Colour: Red
-
Shape: Can (cylindrical)
-
Topmark: Single red can (optional)
-
Light (if any): Red
-
Flash: Any rhythm except composite group flashing 2+1

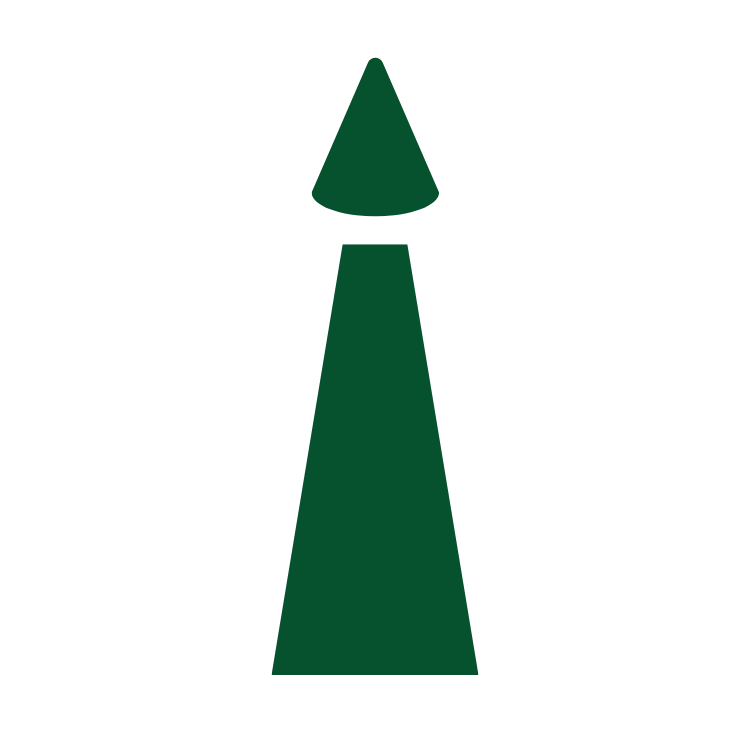
Starboard Lateral Mark
- Purpose: Marks the Starboard Side of a Channel or Fairway
-
Colour: Green
-
Shape: Conical
-
Topmark: Single green cone, point/apex up (optional)
-
Light (if any): Green
-
Flash: Any rhythm except composite group flashing 2+1
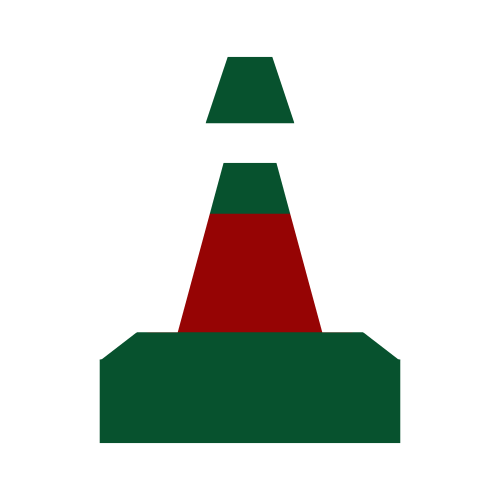
Preferred Channel Marks
IALA A
IALA B
Preferred Channel to Starboard
Purpose: Indicates the preferred (main) channel continues to starboard
Colour: Red with a broad green band
Shape: Can, Conical, or Pillar/Spar
Topmark: Single red can (optional)
Light (if any): Red
Flash: Composite group flashing (2 + 1)
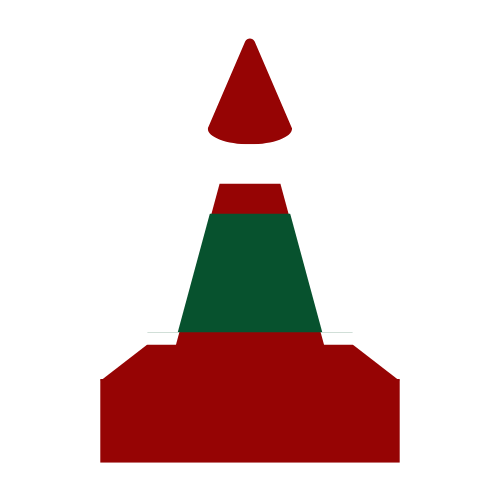
Preferred Channel to Port
Purpose: Indicates the preferred (main) channel continues to port
Colour: Green with a broad red band
Shape: Conical, Can, or Pillar/Spar
Topmark: Single green cone, point up (optional)
Light (if any): Green
Flash: Composite group flashing (2 + 1)
Preferred Channel to Port
Purpose: Indicates the preferred (main) channel continues to port
Colour: Red with a broad green band
Shape: Conical, Can, or Pillar/Spar
Topmark: Single red can (optional)
Light (if any): Red
Flash: Composite group flashing (2 + 1)
Preferred Channel to Starboard
Purpose: Indicates the preferred (main) channel continues to starboard
Colour: Green with a broad red band
Shape: Can, Conical, or Pillar/Spar
Topmark: Single green cone, point up (optional)
Light (if any): Green
Flash: Composite group flashing (2 + 1)


Cardinals
Cardinal marks indicate the position of a danger, such as a wreck, shoal, or rock, and show the mariner the safest side on which to pass. For example a North Cardinal, indicates not only to stay North of it, but that the danger is to the south. The top marks indicate the location of the black colour section on the buoy.

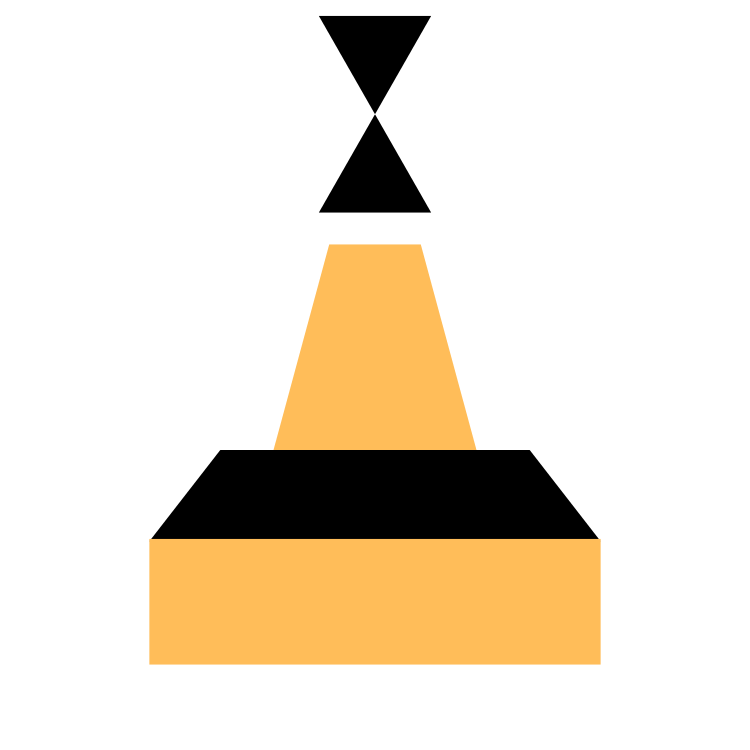
North Cardinal
Colour: Black above yellow
Topmark: Two black cones pointing up
Light: White, very quick (VQ) or quick (Q) continuous

East Cardinal
Colour: Black with yellow band (black-yellow-black)
Topmark: Two black cones point away from each other (↑↓ like an Egg)
Light: White, Q(3) or VQ(3) – groups of 3 flashes

South Cardinal
Colour: Yellow above black
Topmark: Two black cones pointing down
Light: White, Q(6)+Long Flash (LFl) or VQ(6)+LFl – 6 quick flashes + 1 long
West Cardinal
Colour: Yellow with black band (yellow-black-yellow)
Topmark: Two black cones point together (↓↑, like an Wine Glass)
Light: White, Q(9) or VQ(9) – groups of 9 flashes
Other Buoys


Special Marks
Purpose: Marks special areas/features (cable, recreation, spoil ground, etc.), not for a navigation hazard.
Colour: Yellow
Shape: Any
Topmark: Yellow "X" (St. Andrew’s cross)
Light (if any): Yellow
Flash: Any rhythm not used for white cardinal or isolated danger
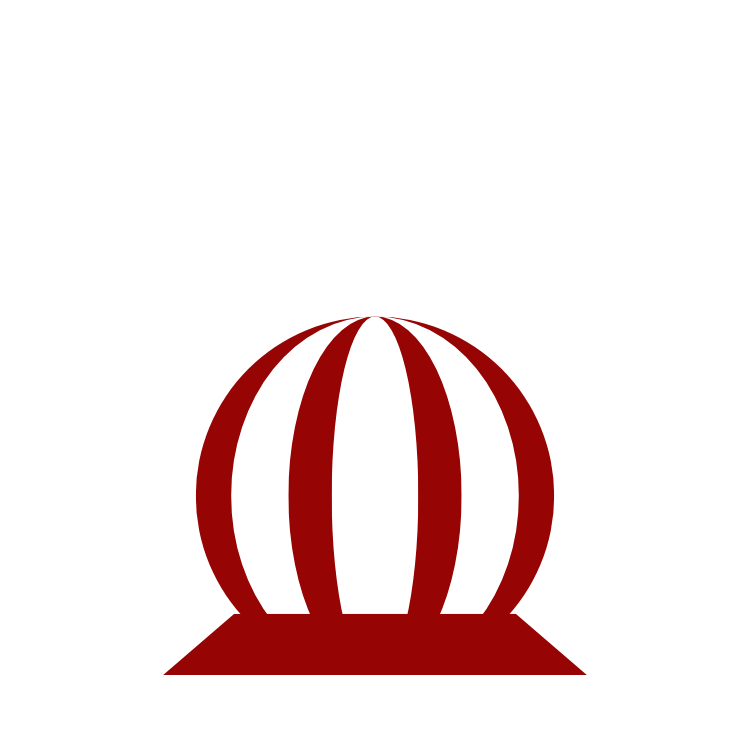
Safe Water Mark
Purpose: Safe Water Marks (Sometimes called Fairway buoys) Indicate safe, navigable water all around.
Colour: Red and white vertical stripes
Shape: Spherical, pillar, or spar
Topmark: Single red sphere (optional)
Light: White
Flash: Isophase (Iso), Occulting (Oc), Long Flash (LFl10s), or Morse “Alpha” (· —)

Isolated Danger Mark
Purpose: Marks a small danger with safe water all around
Colour: Black with one or more red bands
Shape: Pillar or spar
Topmark: Two black spheres (balls) (The Denis the Menace Buoy)
Light: White
Flash: Group flashing 2 (Fl(2))

Emergency Wreck Marking Buoy (temporary or new wrecks)
Colour: Blue and yellow vertical stripes
Topmark: Yellow cross
Light: Blue + Yellow alternating flashes, 1s each